Connecting PBCS applications with OAC to Create Analyses and Visualizations
Oracle Planning and Budgeting Cloud Service (PBCS) is a popular planning solution on the cloud. It is the first Hyperion EPM product on cloud which is more suitable for enterprise wide planning, budgeting and forecasting on the cloud. Organizations often use PBCS to compare the budget and forecast numbers against actuals from transactional system. Oracle supports direct connectivity between PBCS and OAC without any connection adapter options.
In this blog, I will walk you through a series of steps to use PBCS applications as source to create reports/Visualizations in Oracle Analytics Cloud.
- Download and install Oracle BI Administration Tool V12.2.2.0.0 or later.
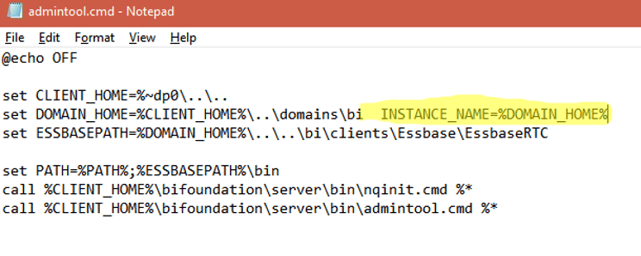
- Navigate to admintool.cmd file and edit the file to add INSTANCE_NAME=%DOMAIN_HOME%
The admintool.cmd file can be found in a location similar to this : C:\ORACLE_HOME\bi\bitools\bin
- Identify the Java Host port number by logging in to Enterprise Manager and navigating to Business Intelligence -> biinstance->Availability->BI JavaHosts. Note the port number to use in the next step.
.png?width=678&name=Screenshot%20(401).png)
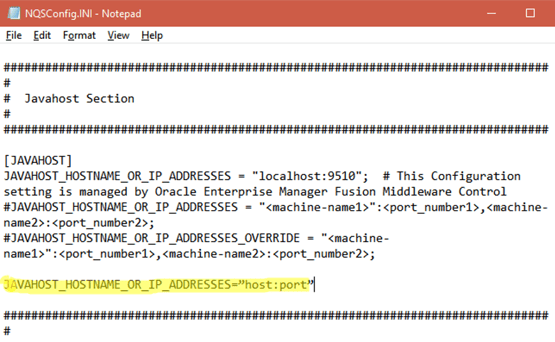
- Navigate to NQSConfig.INI file and Edit the Javahost section in the file to add the below line (replace the host and port part with your OAC host name or IP address and the port number you noted in the above step respectively).
- JAVAHOST_HOSTNAME_OR_IP_ADDRESSES=”host:port”
- You can find the NQSConfig.INI in the location similar to this: C:\ORACLE_HOME\domains\bi\config\fmwconfig\biconfig\OBIS
- Open the Administration tool by clicking Start->Oracle Business Intelligence Client -> Administration.
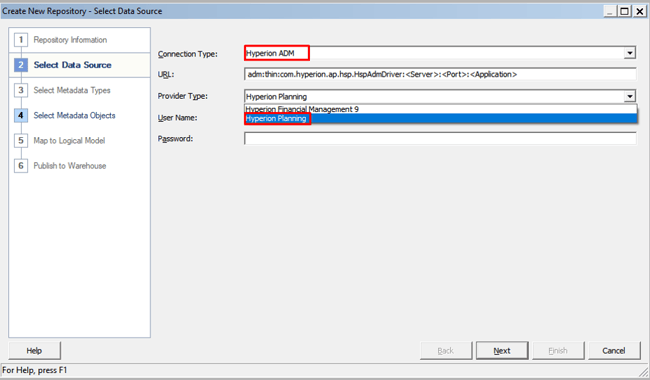
- Create a new repository file by clicking File->New Repository or Ctrl+N. Enter the basic details and click Next to select the data source. Use the following:
Connection Type: Hyperion ADM
Provider Type: Hyperion Planning
URL : Replace With adm:thin:com.hyperion.ap.hsp.HspAdmDriver:<PBCS IP or Host Name>:<Application>?locale=en_US;tenantName=<PBCS Identity Domain>;hubProtocol=https;
In the above, you only need to substitute for your PBCS IP or Host name, Application Name and PBCS Identity Domain And enter a PBCS administrator User Name and Password.
Click Next.
If you get an error at this step, you have to check your Admin Tool log file (NQSAdminTool.log) which is located at: C:\ORACLE_HOME\domains\bi\servers\obis1\logs
- In the Import Metadata –Select Metadata Objects step, select the PBCS Metadata objects that you want to integrate to OAC and move them to the repository pane on the right . Click Finish.
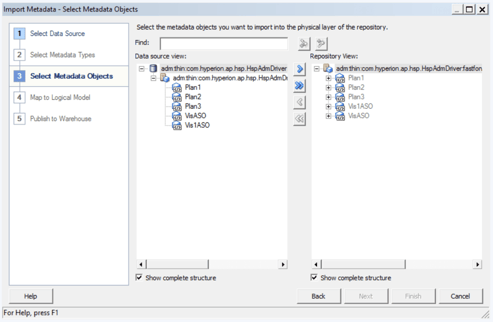
- Now you can see the PBCS applications imported to the Physical Layer of the repository.
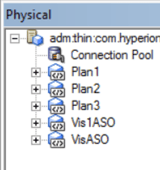
Make sure that you've selected the ANCESTOR_DIM_PROPERTY_SUPPORTED database feature.
9) Complete your data model by dragging and dropping the required tables from Physical Layer to the Business Model and from Mapping layer and to the Presentation layer.
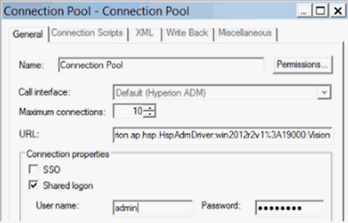
10) In the Physical layer, edit the Connection Pool for this data source, specify a URL using the URL that you used on the Select Metadata Objects page in step 1, and select Shared logon.
11) Verify the data model by clicking File-> Check Global Consistency and save it as an .rpd file. Ignore the warning which pops up saying database features don't match the defaults.
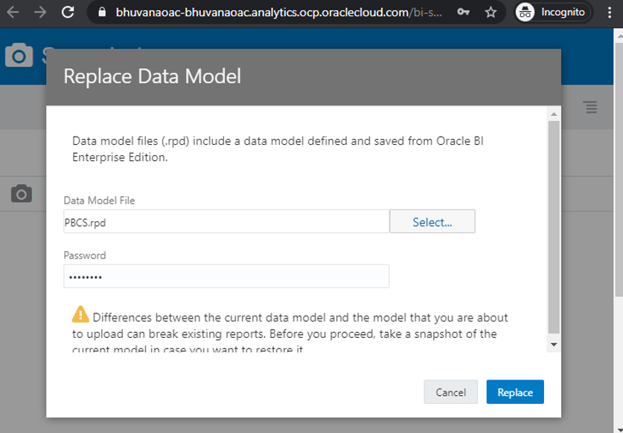
12) Upload the data model to Oracle Analytics Cloud by clicking on the hamburger and navigating to Console -> Snapshots -> Page Menu -> Replace Data Model.
Note: Take a backup snapshot before uploading the repository file.
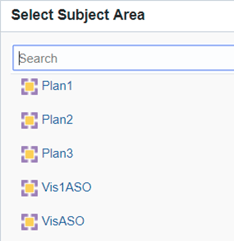
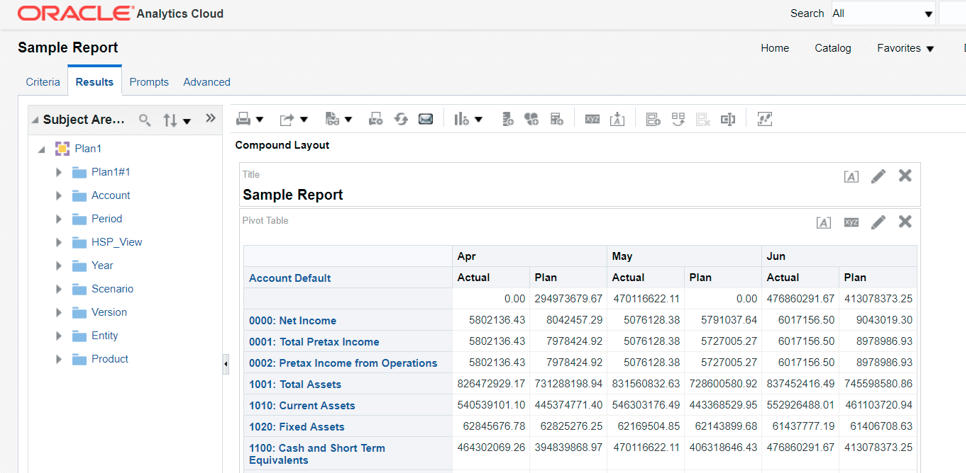
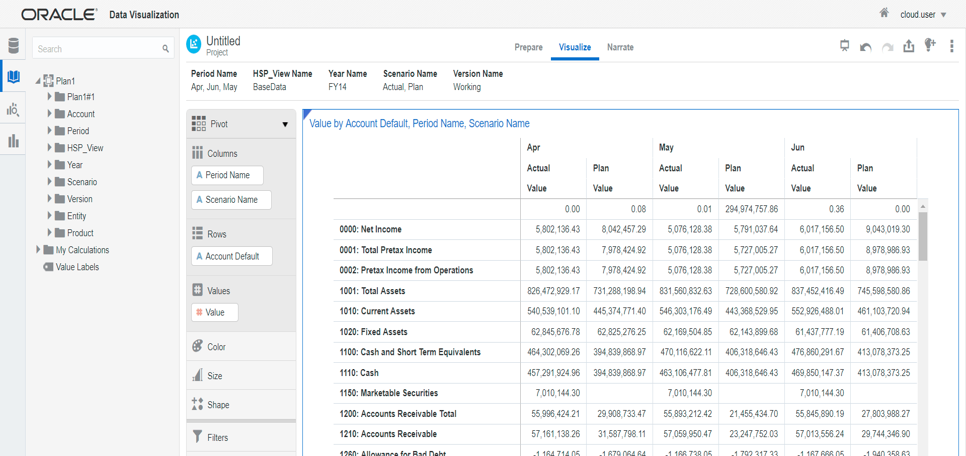
13) Now you can notice that your PBCS application(s) are available under the subject areas for reporting.
For more information on queries in building reports in OAC please get in touch with OneGlobe Systems LLP
